# Menu
{% hint style="success" %}
**Tip:** To add a block, the "[Mega menu](https://mpithemes.gitbook.io/unicorn-shopify-theme/static-sections/mega-menu)" section is required. Press **"Add block"** and choose the one in **Theme Blocks**. Drag and drop the block to the desired position in a drop-down section.
{% endhint %}
Before starting any configurations in the block, ensure the menu is added under your *Shopify admin -> Content -> Menus*. Read the step-by-step instructions on how to create a menu in the following [article](https://help.shopify.com/en/manual/online-store/menus-and-links).
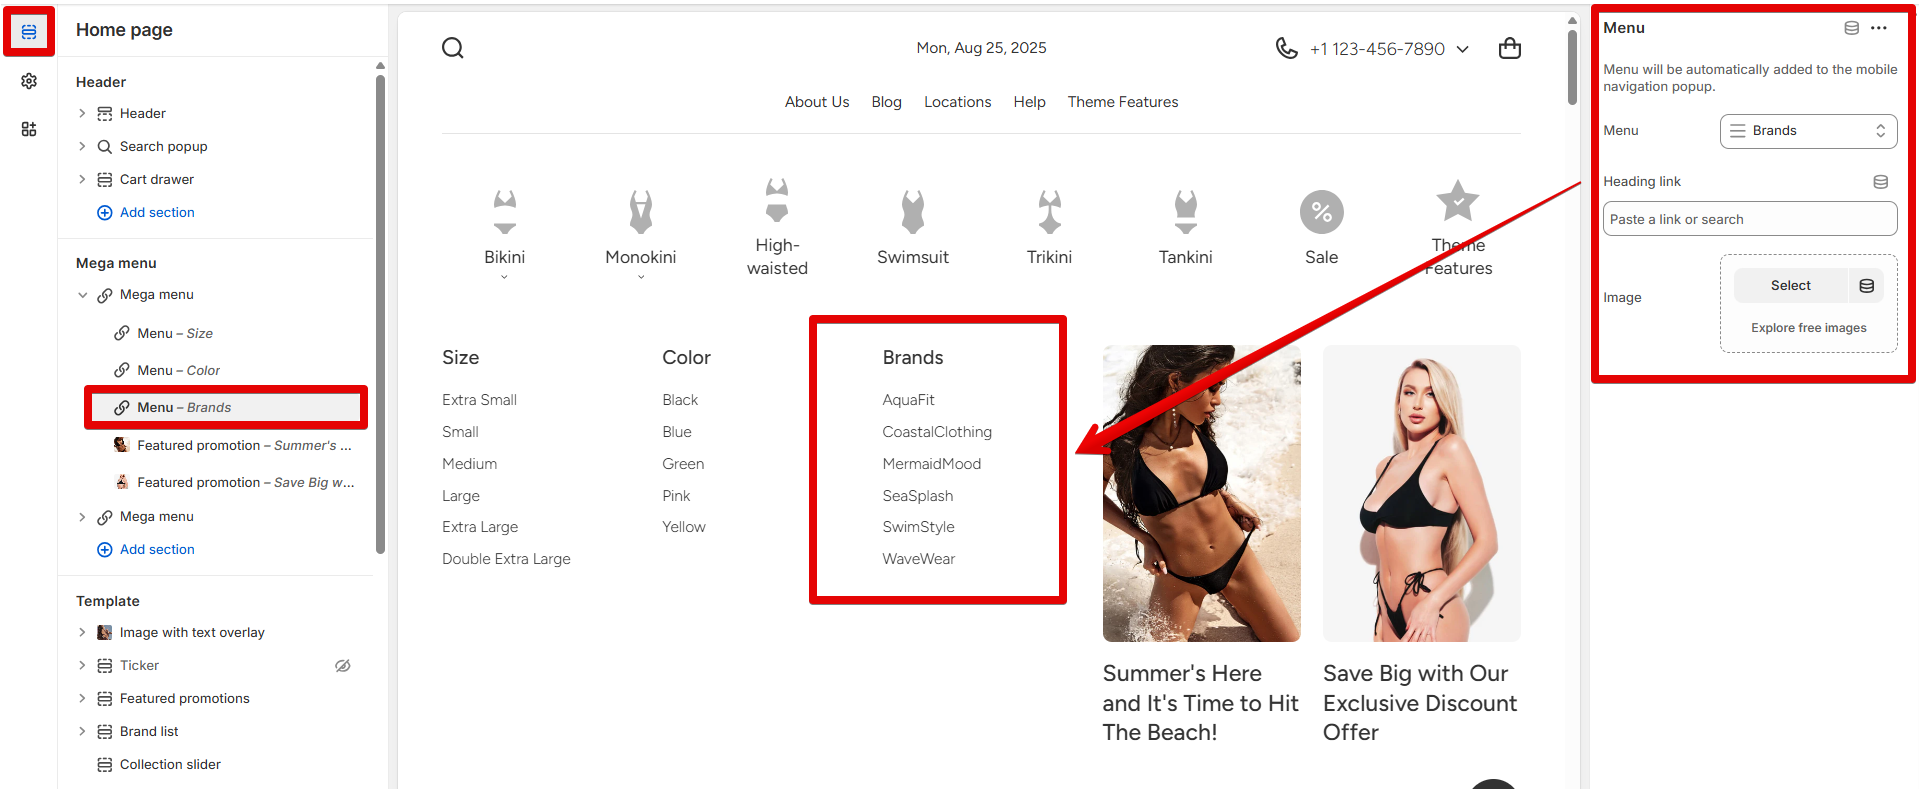
Once the menu is created, you can select it using the **"Menu"**. If you need to direct customers to the required page by pressing the parent link or image, choose a destination in the **"Heading link"** selector.
In the **"Image"** source selector, press **"Select"** to choose media from the image library or upload it from your device. Selecting an image in the source selector activates the next option.
The image you chose as a banner for the menu can be displayed below or under the menu title. Choose the desired option in the **"Image position"** picker: "Before title" or "After title".
{% hint style="warning" %}
**Note!** This block allows displaying only a one-level menu.
{% endhint %}
In the following example, you can view how it might look in a store:
{% hint style="success" %}
**Tip:** Use the **"Badges"** block to associate badges with each menu item. Find more details [here](https://mpithemes.gitbook.io/unicorn-shopify-theme/static-sections/mega-menu/badges).
{% endhint %}