> For the complete documentation index, see [llms.txt](https://mpithemes.gitbook.io/shella-shopify-theme/llms.txt). Markdown versions of documentation pages are available by appending `.md` to page URLs; this page is available as [Markdown](https://mpithemes.gitbook.io/shella-shopify-theme/theme-settings/account.md).
# Account
{% hint style="info" %}
**Theme settings -> Account**
{% endhint %}
## General
Here you can decide whether an **“Account”** header button should be shown or not:

This button will not be shown if the accounts are disabled. You can check it by going to your *Shopify Admin -> Settings -> Customer accounts -> Accounts in the online store and checkout:*
Here you can change the content for the popup by selecting a needed page. If no content is chosen, a default “Include Popup Account” page will be used by the system. Once the popup is disabled, the customer will be redirected to the account page, when clicking the “Account” button.
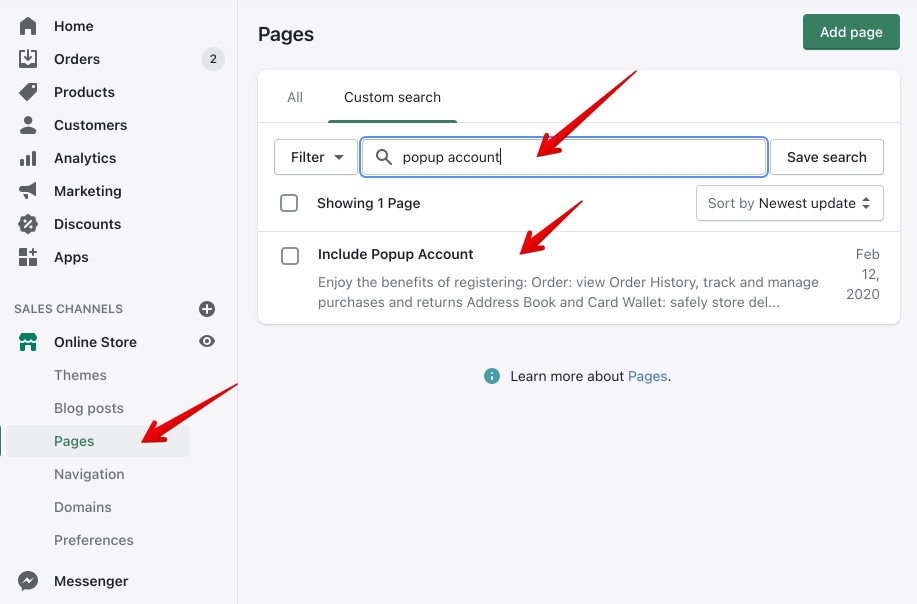
In order to edit the default page for the Account popup:
* Go to your *Shopify Admin -> Online Store*;
* Click on Pages;
* Search for “Include Popup Account” and click on it;
* Start editing the page;
* Save changes
## Popup
You can enable a popup, which will appear when clicking on the “Account” header button:
You can edit the pages in your *Shopify Admin-> Online Store -> Pages*. Then click on the page and edit it with your information. More information about how to add and edit pages you can find [**here**](https://mpithemes.gitbook.io/shella-shopify-theme/get-started/how-to-add-and-edit-a-page).
### **Show subscription**
This option enables you to decide whether a subscription form should be shown in the popup.
{% hint style="warning" %}
**Please note**, the subscription form is visible only after user authorization.
{% endhint %}
## Login Page
Here you can choose the “Sign up” content on the login page simply by selecting a page, which suits you best here, or you can leave it without any content. It is up to you:

## Growave app
### Enable Growave Social Login
This option enables you to activate the Social Login from the app. Read any app instructions regarding how to configure “Account” if you want to use the app. Untick the option if rejected using the app functionality.